Wednesday, March 4, 2015 0 comments By: Becky

How a Business Plan Can Lead to Personal Growth

Normal people who don't have business degrees may not understand the beauty of having a detailed business plan, but I submit to you that everyone needs a "Life Plan" that is structured like you're running a business. After all, if a business deserves a plan and a concentrated daily effort to keep it on the right track, isn't your whole life that important? Do a little soul-searching, and you just might be "falling" into every day without putting your own values and intention into it. That's no way to leave your mark on the world; that's just survival.

The U.S. Small Business Administration isn't usually a site you'd use for personal evolution, but its resources can help you walk through the process of writing a business plan for yourself, your home, and your family. While all three plans are interconnected, start with a plan for yourself. In that very first company description, you'll need to assert your guiding principles. Maybe it's a quote, a Bible verse, the Ten Commandments, or song lyrics, but make it personal. For me, almost every choice I've made in the past 10+ years has come down to one central guiding question: What did God intend? It's not exactly "What would Jesus do?," because I'm not God Incarnate. I'm a simple, fallible human, far from perfect but still here for a reason. Maybe many reasons. But that central question has helped me make decisions for myself and my family, and it's an integral element to the constant prayer conversation I'm having with my Creator every day. 

Find your question. Identify your strengths (gifts), weaknesses, opportunities and threats (SWOT Analysis), and then write a detailed plan that will help you live with intention. Choose your friends wisely, and surround yourself with people who add value to every single day, people who lift you up and support your efforts at self-improvement. Spend your time with people who inspire you. Slowly begin letting negative influences (competitors/threats) go, and focus on becoming better. You define what "better" means to you, and then go after it. Use your gifts (products and services) to build up yourself and those around you, address your weaknesses with detailed project management plans, complete with daily steps you can take to reach your self-improvement goals. Then, stick to the plan. Set yourself up for success, and then work at it every day and celebrate milestones as you reach them.

Naturally, having a plan will help you stay within a budget and meet your financial goals, but starting with your personal plan is important. We all need little "wins" every day to boost our confidence, and it takes lots of confidence to stick to your financial guns when friends and family are spending like it's going out of style. Maybe it's because their goals are different. Maybe they don't mind being a slave to credit card companies, and maybe financial insecurity doesn't make them stress-eat. That's what it does to me, so I'm stepping off the beaten path and making a business plan for myself and my family. It's time to get down to the business of being "weird," as Dave Ramsey says. Luckily, I've had a lifetime of practice in that department.

What is your guiding question? Do you have a plan? Share it. Be weird. You can do it.

5 Ways to Save $8,500 in Baby's First Two Years


That whole “kids are expensive” argument is a young one, and based on spendthrift ideals. But, what if you just give kids what they really need and cut out all the superfluous crap? Then they're not expensive at all.
  1. Breastfeeding saves at least $1,300 in your baby's first year of life (not including equipment). Dr. Grantly Dick-Read was a well-known physician who once said, “A newborn baby has only three demands. They are warmth in the arms of its mother, food from her breasts, and security in the knowledge of her presence. Breastfeeding satisfies all three.” For my purposes, breastfeeding my children also provided the peace of mind of knowing that I didn't have to worry about the cost of formula. I also didn't have to stumble around in the dark at night to make a bottle, so it appealed to my lazy side, too.
  2. Cloth diapering saves nearly $1,500 in a child's first two years. Had I known more about cloth diapering before my boys were born, I totally would have crossed over to the cloth side. The cost savings are almost negated by using a diaper service for you big-city people who have that option, but it's still cheaper. Plus, a good set of cloth diapers will last through two kids, which saves even more.
  3. Making your own baby food can save you almost $700 in the first 12 months your baby eats solids. This is where a steamer basket and a blender will carry their weight. Freeze finely pureed, steamed whole foods in ice cube trays, and each cube is an ounce of baby food that defrosts quickly and can be mixed with mama's milk to thin. Easy peas. Y.
  4. Bedsharing  saved my life by allowing me better sleep, and it saved me about $700 on baby furniture and nursery “accessories.” There are lots of different opinions on how to bedshare or co-sleep safely, and some “experts” will tell you that it's dangerous, blah, blah, blah. For most people, it works. Some people should never consider it, especially if mom isn't breastfeeding. For those who don't sleep with baby in bed, consider a porta crib in your room. That'll still save you big money, and it doesn't have to be a fancy one. Plus, you can take it with you wherever you go and baby will feel right at home when it's naptime. Bonus!
  5. Staying home the first year saves more than $5,000 in child care costs. And, if you cut out all the money-wasting expenses and pay down debt before baby comes, in most cases it CAN be done.
This is just the tip of the iceberg. Dressing your baby in pre-worn clothes (or none when you're at home), making homemade snacks and avoiding unnecessary purchases (like “activity mats”) can add up quickly to some huge savings. Join the converstion and share your own favorite money-saving tips for babies!
Tuesday, March 3, 2015 0 comments By: Becky

Fresh Eggs Daily in 3 Detailed Steps

What if, instead of "reinventing" leftovers, you could convert them to brand new food? Believe it or not, it can be done even in most urban backyards with the help of some feathered friends. Here's a step-by-step guide on how to start keeping backyard chickens.

1. Check Local Ordinances on Backyard Chicken-Keeping

I realize not everyone can have chickens, but the urban chicken-keeping movement sure makes it easier to have a couple of hens in a backyard coop. While city ordinances may restrict the number of chickens you can have (check with the city before you go all chicken-crazy), your coop design and whether or not your girls can free-range, kitchen scraps are a great way to keep chickens occupied and recycle those scraps. You give chickens scraps like wilted lettuce, slimy berries and moldy bread, and they'll give you back a protein source that is rich in antioxidants and long-chain fatty acids. That's a trade you can't beat.

2. Select the Right Breed for Your Climate and Needs

Mother Earth News has a great Pickin' Chicken App for iPhone to help you select your breed. Also, Tractor Supply Company stores now carry heritage-breed chicks in partnership with the American Livestock Breeds Conservancy, which I think is a great cause aimed at preserving America's heritage breeds. The stores carry pamphlets with information about all the heritage breeds they'll be stocking during their Chick Days each spring. Select birds that are appropriate for your setup, and do plenty of research and preparation before you bring your girls home. Local feed store owners are an excellent resource for which chicks are the most popular in your area. They're also fantastic resources for local feed and emergency help.

3. Let's Pick Up Chicks

Love them, feed them, and name them George, and in just half a year or so, VOILA! Insert scraps, collect fresh eggs in the morning. It's a win-win.

(Note: Some people think chickens shouldn't eat meat, which I think is crazy since chickens are omnivores. But, your chickens will eat what you give them. It's totally up to you, so do your own research.)

Six Food Scraps You Can Regrow in Your Kitchen and Garden

Growing lettuce in your kitchen
Organic romaine hearts, 3 days.
Leftovers can be handy for creating new meals and feeding hungry chickens, but if you've ever had carrots sprout little roots in the crisper tray, you've witnessed the greatest thing about fresh food: it can grow MORE fresh food.

Imagine my excitement when I found out there was a book called, “Don't Throw It, Grow It!, ” that was all about growing food from your kitchen scraps! Sadly, I checked out the book from my local library and quickly realized that it wasn't about growing food at all. It was about growing pretty plants from your food scraps, and it was geared toward people living in apartments who didn't have the money to buy house plants. I'm not opposed to sprouting a sweet potato vine, but for my purposes of stretching our food budget, I wouldn't keep that vine in a pot on a windowsill. Plant that same sweet potato in a tire, bury all but six inches of the vine as it grows (by stacking tires and adding soil), and by the first hard freeze next year you have 20 pounds of sweet potatoes in a tire tower. Now, that's a recycling plan I can get behind. Other food scraps that can turn into food are:
  1. Onion root ends, including green onions or scallions. Chop the onion, plant the roots and keep moist. You will grow another. Whole. Onion. I kid you not.
  2. Carrot tops. Carrots produce seed in their second year, so grow your own carrot seed by planting the tops of carrots (usually sold at a year old) and sprouting the greens. The carrots you use must be non-hybrid/open-pollenated to guarantee seed production. Try organic.
  3. Lettuce and greens. Put the root ends of romaine lettuce, celery hearts, turnips and beets in a glass full of water. Grow a salad in your windowsill.
  4. Kiwi vines. Kiwi is a tropical fruit and likes it hot, with some watering to help it along. The vine grows FAST, and you need a few to guarantee you get a male and female so they produce fruit (technically, berries). Plant a slice of kiwi in a pot of soil, keep it moist and wait for seedlings.
  5. Sprouted garlic cloves. Plant a clove of garlic in the early spring or fall, and in a few months you've got a whole head of garlic! Talk about return on investment.
  6. Sprouted potatoes. Now's the time to cut those sprouted potatoes up, roll them around in some wood ashes to prevent rot, and put them in the ground, sprout facing up. Read up on growing potatoes, because you'll be doing it!
There are lots of other fruits and veggies you can plant, and some I won't try because they won't produce anything usable. Avocado pits may grow into nice trees, but they won't produce fruit north of Brownsville, Texas, unless they're in a 40-foot-tall greenhouse. My parents are currently growing teeny orange trees from seeds that sprouted in old fruit, but since most citrus and apples are grafted, these little trees may not grow true fruit. Only time will tell. The moral is, keep a stack of small paper or plastic cups and a bin of potting soil near your cutting board, and plant those scraps to see what grows. Then tell me so I can copy you and share with the class, m'kay?
Monday, March 2, 2015 0 comments By: Becky

The Best Tips For Eating Healthy on a Budget

People say it all the time: "It's expensive to eat healthy." I'm gonna hafta call that for the load of bull that it is, and I'll tell you why with an example from last night.

My children attend public school, and we all know what a cesspool that place can be with all those little nose-miners sharing much more than their glue sticks. (Ack!) My punks are snotty and have persistent coughs, and Facebook is lighting up with tales of the flu, so we had an immune-boosting supper last night to load up on some of nature's simplest medicine. Let's look at the menu and break it down by food group, and you'll see just how cheap it can be to eat well.

The Best Tips For Eating Healthy on a Budget
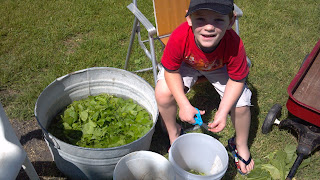
My garden helper, cutting and washing turnip tops. Oh, my heart!

1. Beverage: Water. We drink tap water, straight up. When the kids are fighting allergies or a bug, we stay away from sweetened drinks, artificial sweeteners and dairy. Fruit juice doesn't even make the cut because of sugar content, but I will sometimes allow fruit-and-veggie drinks (limited to one a day, of course). Tap water gets a bad rap sometimes, but get a filter for your faucet or a filter pitcher, and you'll still spend less than if you bought drinks, and your kids will be healthier. Voila.

2. Garlic toast. Normally, I limit the amount of bread my family eats if at all possible, and then it's usually only homemade (less than 50 cents a loaf for whole wheat bread). Last night we had some free whole wheat hot dog buns (thanks, Mom!), so I toasted them in halves and loaded them with a smidge of butter and SIX minced garlic cloves. It's spicy, but whatever they can get down, fresh, raw garlic is magic stuff when it comes to boosting the immune system and preventing infection.

3. Salad. We're in that phase where my boys whine about veggies (totally new to me, I've been spoiled!), so I make them as colorful as possible and sweeten the deal with a favorite dressing (homemade Ranch or Italian) and a tiny amount of shredded Parmesan to "fancy" it up. The ingredients, diced small: Organic Romaine hearts (worth it to buy organic for lettuce), red bell peppers (vitamin C powerhouse!), celery, cucumbers and carrot coins. Salad fixings vary depending on what's cheap at the store, but sometimes we also include apples, mandarin orange sections, sweet peas (frozen or from our garden) and pecans from our own front yard. Make a theme, mix it up and make it fun!

4. Chili Penne. This is my least-favorite part of the meal, but it's a concession to the pasta hounds. I used whole wheat penne pasta (bought on clearance at HEB for 75 cents a box) and dressed it while it was hot with leftover beef-and-veggie chili. I was told it was "awesome!," and gratified to see that my kids actually ate very little of it after the first course. Score!

Desserts at our house are rare, but I do allow yogurt and honey (or chocolate chips) when the kids aren't sickos. Otherwise, a chopped apple (with skin!) topped with cinnamon and microwaved for a minute makes an "apple pie" dessert that won't result in a psychotic sugar rush when it's time to wind down for bed.

So, instead of bottles and bottles of cough syrup at $4-7 a pop, I feed my family real food and water. It's important to buy organic only if it's important to you, and I'll spring for an extra 50 cents for organic lettuce and carrots. I can still feed my crew for less than $5 per meal, and although that messes with my food budget, it's a worthwhile trade-off to avoid hospital co-pays, antibiotic prescriptions and kids who feel yucky. Even for cheap moms, healthy meals are not only possible -- they're the essential ingredient to keeping the family healthy and sane.
Sunday, March 1, 2015 2 comments By: Becky

Think outside the recipe: Pantry cooking saves money and time


Way back when our family lived on two incomes, I actually shopped for stuff called for in recipes. Now, I shop for the cheapest possible healthy items in food groups and find recipes (or make some up) that use what I have on hand. THAT is the concept of pantry cooking, and it's the one thing that can save you significantly on groceries.

First off, I have to say that if you don't have the More With Less Cookbook, get it. Find it used if you can, scour used book stores or garage sales, but get it. This is the only cookbook out there that has cheap people in mind and actually caters to pantry cooking and never wasting a morsel. Also, the recipes are low-sugar, which is great for my diabetic Hubs.

Today, I'd been de-nailing a pile of used lumber I'm going to recycle into a barn, and suddenly realized that it was 5 p.m., and I'd defrosted no animal proteins for the Chez Cheap evening meal. What's more, I'm pretty sure everyone is tired of canned green beans, and the five I picked in the garden... well, even I can't make those stretch far enough for four of us. In the fridge, I saw two heads of cabbage that were starting to look a little suspect, bacon ends and pieces (strictly for flavoring recipes, this stuff works great and it's super cheap as bacon goes), and five dozen eggs (from our chickens). When I was new to all this, I'd look in the More With Less index under “cabbage,” because that's what I had the most of that needed to be used, er, very quickly. Because I know my book so well now, and know what my family loves, I had three days' meals planned with that single glance in my fridge (Formosan Fried Cabbage with rice, Eggs Foo Yung, and Vietnamese Fried Rice).

If the fridge had been bare and I had gotten a head start, we could have turned away from Asian and gone more Mexican. A slow cooker (tightwad must-have) full of pinto beans can feed my family for at least a week, but I usually cook two pounds of beans so I can freeze some. (Think Bubba from Forrest Gump as I extoll the virtues of pinto beans, beans and corn bread, refried bean dip, bean and cheese tacos, bean and cheese nachos, fried bean patties, beans and rice, chili with beans, bean enchiladas...)

The bottom line is, you don't have to follow a recipe for every meal you make, and the ones you use the most should feature cheap food that's also healthy. Shop the stock-up sales, cook with what you have, and: Never. Waste. Anything. That's my cheapo mantra.
Sunday, February 22, 2015 2 comments By: Becky

Earn a bigger "hourly wage," extend your financial resources


Whatever you decide to do to save money, both large and small changes can add up quickly. I once heard somewhere, “You can't be poor AND lazy.” So, when my ancient washing machine quit agitating, I had choices. I could:
  1. Call a repairman, most everyone's first choice;
  2. Throw out the old washer and buy a new one (EEK!), the spendthrift's first choice; or
  3. Quit assuming I wasn't smart enough to fix a washing machine.
I Googled the machine's make, model number and “won't agitate,” and within five minutes had a plausible answer. Opening the top of the agitator, I confirmed that some little plastic cogs had worn down. The next day, I bought them for $4.85 at a local appliance repair shop. It took me 15 minutes to take apart the top of the agitator, clean out the pieces of the old cogs, slip the new ones into place and put everything back together again. The washer was good as new.

If I had paid a repairman to come to my house, it would have been $85 for the service call (I did call a local company, just to find out in case I couldn't fix it – there's that self-doubt again). They would then charged $50 an hour for labor (minimum of one hour), and I have no idea how much they would have marked up the parts, so let's keep the parts at $4.85. If the repairman fixed the washer in the same amount of time it took me, the minimum bill would have been $139.85. My total was about $15 including gas (I live 20 miles from the repair shop), so I saved $124.85, but that's not the important thing. The work I did in 15 minutes was worth $139.85, taking my hourly wage to $559.40 ($139.85 x 4, the number of times 15 minutes goes into 60).

That's the really high end of hourly wages. On the other end, there's clothesline vs. dryer ($6.00/hr) or keeping chickens ($5.16/hr, accounting for feed but not water because I use rainwater). Those low hourly wages are worth it to me for other reasons, though, so I'm willing to spend my time doing them for less than my base hourly wage (which I usually set at about $10/hr.). If it's not important to me and my hourly wage doesn't make the work worthwhile, I pay someone else to do it. I don't change the oil in our trucks because the hourly wage turns out to be less than $10/hr after buying the oil and filter. Also, I have a five-year-old running around and don't like to be under a pickup when he's with me. If you like getting used engine oil on your hands, don't mind finding a place to dispose of it, and don't have small children who want to crawl under there and “help,” it might be worthwhile to change your own oil.

Then again, you could always use a (*gasp!*) coupon for an oil change, which would bring your hourly wage way down or into negative numbers and just doesn't make DIY the sensible choice. Coupons ARE good for some things...
Friday, February 20, 2015 0 comments By: Becky

Using bulk buys to cut the grocery budget


It's not that we eat tuna all that regularly. It's not that I'm prepping for the zombie apocalypse. It's just that, when I find that deal that's so good I have to post it on Facebook (you know you've done it), I don't ever buy a sensible amount. I buy almost everything on the shelf.

There's a little controversy surrounding stock-up buys. Some people say it's not fair for one person to buy two cases of tuna because it's a loss leader at 2/$1. I say, since when is life fair? Everyone else should have gotten there sooner, because my pantry will be stocked with cheap food for as long as I can keep it that way (50 cents for a 5.5 oz can of tuna is a protein source at less than 10 cents an ounce). When I find that once-a-year deal, I have to be able to pay for it, and that's where a stock-up fund comes in handy. It's the cushion that allows you to buy your normal grocery budget while stocking up on the occasional awesome deal. Normally, $100 is a good amount to budget for unexpected windfalls, but if you can set aside more, that's even better. These are the sales that will get your grocery spending down further than you ever imagined was possible, so don't be shy – buy everything you are comfortable buying. Store it under a bed or a couch if you run out of room in the kitchen.

Of course, spotting these super awesome deals means knowing your prices and/or carrying your price book. Hubs glanced away for a moment at the grocery store last week and was SHOCKED, I tell ya, when he looked back and saw me loading 10 pounds of butter into the cart. I explained, gently, that butter is a staple and staples don't ever go on sale, so 30 cents off is a big deal for butter (which is yet another thing that freezes beautifully). If I had a decent sized deep freeze, I would have gotten three times as much as I did: it was the cheapest I had ever seen it. I'm still kicking myself for only bagging up seven pounds of free mangoes at the local Mexican market last week. D'oh!

Some women brag about some fancy shoes they got for 10 percent off. I brag about a year's worth of coffee for $54, or two months' supply of milk for $5 (freezes!). My shoes, by the way, are $120 shoes that someone got a "great deal" on, then wore twice and sold to me for 50 cents at a garage sale.
Saturday, February 14, 2015 2 comments By: Becky

The top 5 items every frugal foodie needs


Multitasking is something lots of people are good at, but how good are your kitchen tools at multitasking? When you have a small kitchen, a small budget and value your time, there are five multitaskers you must find at garage sales to help maximize your hourly wage.

Big-ticket item No. 1: Bread machine

I live in Texas, and it gets HOT. Bread is expensive to buy, but super cheap and a lot healthier to make. I do not, however, want to heat up my oven when it's 110 degrees outside. My bread machine was free (thanks to a super awesome cousin/best friend who got it at a garage sale for 20 bucks and shared the love – thanks, TripleR!). It is the Cadillac of bread machines, a Zojirushi with so many settings you can't even shake a stick at 'em. It takes me three minutes to load and set it, and when we wake up in the morning, it's to the smell of fresh-baked bread. (Wipe your mouth, you're drooling.) Buy a bread machine cheap, and cross bread off the grocery list. BIG savings.

Foodie must-have item No. 1: Good knives

We have pretty expensive knives, thanks to some generous wedding guests. The thing is, we usually only use the paring knife, the 10-inch chef's knife and a cheapo bread knife we stuck in the block with the stuck-up Henckels guys. So, instead of buying the whole block for $399, you could just buy individuals and put them in a cheapo block. They're still mind-numbingly expensive for knives, but dull knives in the kitchen are dangerous, and these last for. Frickin. Ever. You'll thank you.

Mom must-have item No. 1: A blender

Smoothies are a mom's best friend, and no store can sell salsa that's as good as what Hubs can whip up in the blender. Plus, it's handy for making ranch dressing. Did I mention smoothies? Old, mushy fruit (and even lettuce, a.k.a. a “Shrek Smoothie”) goes into a baggie and into the freezer, then straight into the blender with a little milk, yogurt or just water for an awesome summertime snack. My kids think it's a treat. Gosh, even our snacks are multitaskers!

Girlie splurge item No. 1: A KitchenAid stand mixer

I would NEVER have purchased this for myself unless I found an awesome Craigslist deal, but Hubs went behind my back and bought it for Mothers' Day one year. It makes any kind of baking such a breeze, and kneads specialty breads for me so I can do other stuff. You can find lots of attachments for sale online that have been barely used that make it a sausage grinder, ice cream maker, pasta machine and maybe even a really good mixer. And it's pretty. So, so pretty. My precious...


Alternative to pricey stuff item No. 1: A food processor

There are plenty of pricey food processors out there, but lots of people ask for them when they get married, then sell them at garage sales about five years later after using them once. This is a must-have for making baby food, but can also mix and knead doughs just fine. It also whips up some dreamy pesto with fresh basil from the garden. Oh, and it chops veggies like a champ. Even those miniature versions like the Magic Bullet do just fine, and can also take care of a lot of your blending needs, too. They can even take care of a lot of your “blending needs,” too. Like frozen margaritas after a whole day of very organized freezer cooking.
Tuesday, February 10, 2015 2 comments By: Becky

Project: Salvage-Style kitchen island for less than 30 bucks


OK, I'll admit it. I have a lot of pet peeves. People who say, “libary.” Misspellings or incorrect punctuation in advertisements (I will never shop there). Shipping film left on electronic devices and appliances (eek!! Must...peel...).

But maybe my biggest pet peeve is people who claim they're selling something frugal, because it's a bold-faced lie. Frugal can't be bought, that's the whole POINT. If you have to buy something to call yourself frugal, thrifty, or any other popular label floating around cheapo-world these days, go ahead.

But I don't have to like it.

Case in point: I got an e-mail from a home improvement warehouse that sometimes offers good tips or pretty pictures I can get ideas from. Their big sell this time? “Salvage Style Kitchens.” They take stock cabinetry and make it look funky by adding ginormous wood corbels to kitchen islands, “distressing” the paint to make it look old and worn, and then charging three times more than they would normally (it was seriously like $1,400 - I snorted!). Really? Like any self-respecting trash picker would pay $125 each for mismatched milking stools that aren't even the same size. We'd use the stuff if someone gave it to us or we found it on the curb, but why on Earth would I spend thousands of dollars on stuff I can find and/or make for nearly free?

$22 kitchen island
"Salvage style" $22 kitchen island, made out of two free bathroom vanities. Note super-stylish salvage bar stool at right, next to the dog's bowl, which came with the dog.
I must be way ahead of this trend, because my entire home is in true “salvage style,” which I love because it's free or nearly-free. My kitchen island is fast becoming the latest object of my affection. Right after we moved into this house, I saw an ad on Craigslist for two free bathroom vanities. The Most Awesome Goat Rancher I Know helped me load them up and get them home, and I put them in the kitchen, back-to-back. Mr. Rancher then built a custom-made top for my cabinet island, and it became functional. My boys and I recently (finally) painted the whole base a soft green (paint was given to us), and I (finally) installed some hardware I bought two years ago at an actual salvage store. Total cost for my island: $22. Now if I can just decide whether to use tile or laminate on top, it'll be finished.

Guess I'll be watching the curbs to see what turns up...